Module 2 The Major Scale on One String
Module 2 brings the ideas from Module 1 onto the guitar, one string at a time. The major scale is the reference system that everything else in the course is measured against, so these three lessons build it from the keyboard up: where note and interval names come from, how to find every note of the scale on a single string while always knowing which scale degree you’re on, and the three-note fragments that become the first visual mental model of the course.
2-1 The Major Scale as a Reference System▶ Watch the video
The major scale is the foundation of the language of music theory. To visualize it, it helps to step away from the guitar briefly and consider the piano keyboard. That might sound strange in a guitar course, but the guitar makes some things harder to see: the same middle C can be played in five different places on the neck, while on a piano every note has one and only one location. You don’t need to learn piano; the keyboard just makes the underlying structure easier to see.
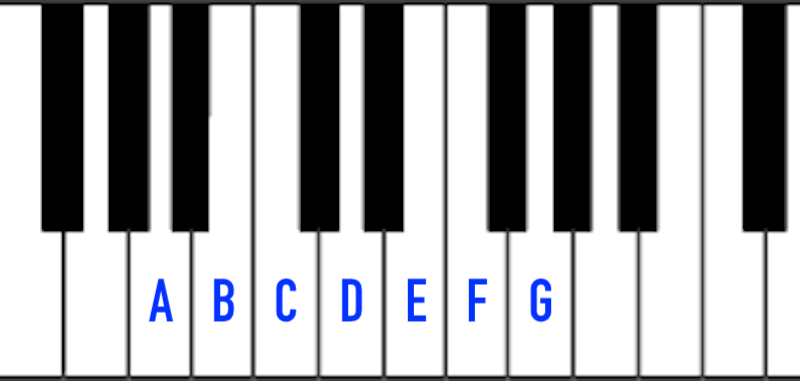
The piano organizes the twelve notes of the chromatic scale into repeating groups of seven white keys and five black keys. The five black keys are subdivided into groups of two and three:

The names of the notes are based on seven letters that range from A to G, which all fall on white keys:
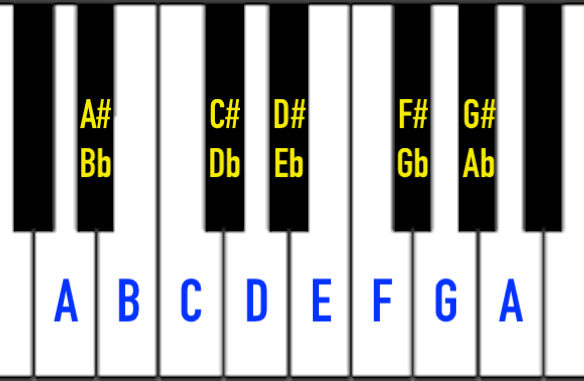
The black keys are named relative to their neighboring white keys, and each one has two names. The black key just to the right of a white key adds a sharp (#) to the white key’s name. The black key to the left of a white key adds a flat (♭).
Memorize this: The major scale is defined by a specific series of whole-step and half-step intervals. A whole step is two semitones (moving two adjacent piano keys on piano or two frets on guitar), and a half-step is one semitone. The major scale sequence is W-W-H-W-W-W-H:
The small numbers inside the black note circles are scale degrees, which denote the position of each note inside the scale.
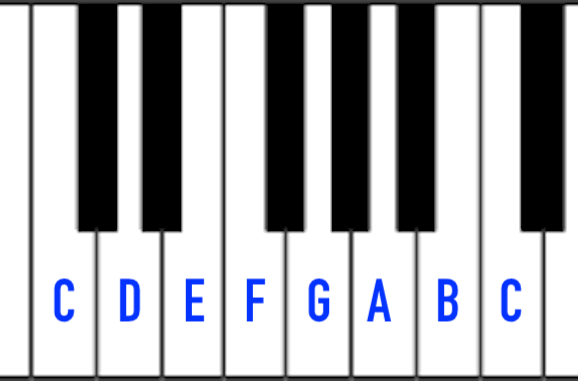
It turns out that if you start on a C note on the piano and construct a major scale, it falls entirely on white keys. This means that the key of C Major contains no sharps or flats, which makes the C major scale on a keyboard a great visual reference. The name has two parts: C is the root, and major means the other notes are related to C by that specific set of intervals.
Scale degrees and intervals are related but different ideas. Scale degrees are positions inside a scale, always counted from the root: in C major, C is 1, D is 2, and so on up to B at 7, and then C is 1 again. Intervals are distances measured in semitones, and you can measure them between any two notes. There are twelve possible interval distances ranging from 0 to 11 semitones, and the intervals take their names from the major scale.
Here’s how this chart was constructed:
- The major 2nd, 3rd, 6th, and 7th intervals (abbreviated M2, M3, M6, and M7) are each named after the corresponding scale degree of the major scale.
- The fourth and fifth scale degrees are called perfect intervals, so they are abbreviated P4 and P5.
- A minor interval is created by shrinking a major interval by one semitone. This gives us the minor 2nd, 3rd, 6th, and 7th, abbreviated m2, m3, m6, and m7.
- A perfect interval raised one semitone is called augmented. If flattened, it is called diminished. That accounts for the one remaining interval: the six-semitone interval between the 4th and the 5th, which is called either an augmented 4th or a diminished 5th. It’s also called a tritone, since six semitones is three whole steps.
- In practice, we can often drop the terms major, minor, perfect, augmented, and diminished. We can simply refer to each interval by the closest larger major scale interval, and add a flat symbol (♭) if it isn’t a major scale interval.
You don’t need to memorize all of those details. The point is that once you know the major scale, the interval names stop being an arbitrary list and become something you can work out. Scale degrees always refer back to the root, but intervals measure the distance between any two notes: from the 2nd scale degree up to the 4th, for example, is three semitones, a minor 3rd.
Note that, by default, intervals are measured moving up in pitch, so if we are measuring a downward interval, we have to explicitly say so. When talking about an interval going up, we usually say “of” rather than “above,” so we can say that F is the ♭3 of D, or D is the ♭3 below F. Measured upward from F instead, D is the major 6th of F. This can get confusing, so I’ll try to be clear about what I mean throughout the course; most of the time, an interval name means the distance going up.
2-2 The Major Scale on One String▶ Watch the video
The goal of this lesson is to be able to find every note of any major scale on any string, and to always know where you are inside the scale. This is a surprisingly underdeveloped skill for most players, but it is highly worthwhile. Working on it will make your playing more melodic, and if you ever find yourself in an unfamiliar tuning, you’ll always have single-string playing to fall back on, since every individual string is just a chromatic scale laid out in a straight line, no matter the instrument's tuning.
To start out, you should develop the ability to move up and down within a major scale on one string using only your index finger. Keep track of which scale degree your index finger is on at all times and use the whole-step/half-step construction of the major scale to move from one scale degree to another. If you know the scale degree under your finger, you know how far to move toward the bridge to reach the next degree up, or toward the nut to reach the next one down, anywhere on the fretboard and in any tuning. You don’t even need to know the name of the note you started on.
Freeze the root as a drone whenever you practice a scale. The drone reminds your ear of the tonal center, it helps you hear the quality of each scale degree relative to that center, and before long it flags your mistakes for you, because any note outside the scale starts to sound “off.”
Memorize this: When moving from one scale degree to another, always move two frets, except between scale degrees 3 & 4 and between scale degrees 7 & 1.
Exercise 2-1: Start with your index finger on any fret of any string. This note will be the root of your major scale (scale degree 1). If you have a Freeze pedal, use it to freeze the root and create a drone. Then, move up the scale along the string as high as you can go, naming each scale degree and playing each note of the scale as you go. Then, from that highest note, descend the scale, playing each note down to the lowest one you can play on that string (this may or may not be the open string). Finally, from the lowest note, play back up to the root. At all times, you must keep track of the scale degree of the note that is under your index finger.
There are 12 possible keys and six strings, which yield 72 variations of Exercise 1. Each day, try doing this on different strings and in different keys. Once it feels comfortable, try playing in time with a metronome. There’s no need to build up a lot of speed; the click adds one more constraint that forces you to keep your focus, so if you can do this in time, you know you have a solid handle on the skill.
🔒
The metronome and drone generator come with the course.
Sign in with the account linked to your Patreon membership to check your access, or Silver and up, or owning any course, unlocks it.
In the video, I demonstrated these two variations:
Exercise 2-2: Using the same one-finger strategy as Exercise 1, move within the scale step-wise, changing direction at random. Feel free to vary your rhythm to make this sound a little more musical, but continue to use only your index finger and always keep track of which scale degree it is on. For an optional added challenge, try skipping over some notes while staying within the scale.
This isn’t music yet, but it’s a good warm-up for your brain, and it pays off later. Jumping two scale degrees at a time is harder than it sounds; the easiest way is to keep visualizing one step at a time and skip playing the middle one.
The key idea in this lesson is simple: always know where you are inside the scale. You won’t always keep scale degree numbers in your head, and certainly not for every note you play. Later in the course I’ll show you a few landmarks for finding your place on the fly. But scale degrees are what let you switch between different mental models as you play, which is why this module is so focused on them.
2-3 Three-Note Fragments and Melodic Motion▶ Watch the video
This lesson introduces the first visual mental model in the course, and it’s an important one: the major scale broken into small, overlapping fragments of three adjacent notes. These same fragments show up again and again in the visualization approaches later in the course, so they are worth memorizing. Since there are seven scale degrees in the scale, there are seven possible patterns.
Look closely, and you'll see only three distinct patterns: fragments 4 and 5 repeat fragment 1, fragment 6 repeats 2, and fragment 7 repeats 3. These shapes are reusable building blocks, and they will be useful throughout the course.
Memorize this: There are only three three-note fragments inside the major scale: a W-W pattern that starts on scale degrees 1, 4, & 5, a W-H pattern that starts on degrees 2 & 6, and a H-W pattern that starts on degrees 3 & 7.
To play one of these patterns, use your index finger to play the lowest note. In position playing, guitarists are taught to assign one finger to each fret: index on the lowest note, little finger on the highest, and middle and ring for the frets in between. The W-H and H-W patterns work well with that constraint, but you will need to shift or stretch to play the W-W pattern. On the upper frets, you can often get away with the first three fingers; on the lower frets, most people use index, middle, and little finger, and it helps to angle your fingers relative to the frets to make that stretch comfortable. There’s no one correct fingering, so choose whatever feels most natural to you. What matters is knowing which scale degree your index finger is on and which pattern sits there.
Now flip the perspective. Instead of treating the fragments as something inside the scale, use them as building blocks. Put your index finger on the root and play the three notes of fragment 1, shift your index finger up to the next scale degree and play the fragment that belongs there, and keep going until you run out of frets. Descending works the same way: shift down one or two frets, according to the whole-step/half-step formula, and play the fragment for the degree you land on. Three simple shapes plus the construction of the major scale is all it takes to play smoothly up and down a string.
Once the fragments are under your fingers, you don’t have to play each one straight up and down. Change the order of the notes, and it turns into a melody. For the moment, we will define a melodic sequence as an ordered sequence of notes played inside one of these three-note fragment shapes. We will expand on this definition later in the course. We can specify a melodic sequence by a list of the numbers 1, 2, & 3, which correspond to the three notes in the pattern. A simple ascending pattern is 1-2-3. A simple descending pattern is 3-2-1. A common six-note pattern is 3-1-2-3-2-1. Notice that a melodic pattern does not need to include all three notes: 1-3 is a perfectly valid pattern.
Exercise 2-3: Choose a melodic sequence. Start on any string and any fret, and assign that note to be the root of a major scale. If you have a Freeze pedal, create a drone from the root note. Placing your index finger on that note, play your melodic pattern using Fragment 1 (W-W). Shift your index finger up to the next scale degree and play your melodic pattern using the appropriate three-note fragment. Always keep track of which scale degree is under your index finger. Continue moving up the scale until you run out of frets. Do the same thing descending the scale until you reach the nut.
🔒
The metronome and drone generator come with the course.
Sign in with the account linked to your Patreon membership to check your access, or Silver and up, or owning any course, unlocks it.
Practice this exercise with different melodic sequences, on different strings, and in different keys. Once you get the hang of it, practice with a metronome and practice shifting up and down at random.
The number of variations is enormous. There are over a thousand ways to choose up to six notes for a sequence on one fragment; multiply that by six strings and 12 keys, and you have more than 75,000 possible exercises. You don’t need to practice all of them. It just shows how much mileage a small idea can give you. Pick a few different sequences each day and make up your own rather than repeating the examples below, because playing new variations every day improves your understanding and your playing much faster than the same versions over and over.
You can also use this exercise to work on technique at the same time: these patterns are great for alternate picking and just as good for legato, so feel free to add hammer-ons and pull-offs. There’s no speed goal. Find a tempo that’s comfortable for your hands and where your brain has to work a little to keep up with the shifts.
In the video, I demonstrated this with three example melodic patterns, all starting at the first fret of the B string, a C note. Here are those examples extended across the entire fretboard:
We’ll come back to the major scale later in the course. Next, we'll take a deep dive into the pentatonic scale.